
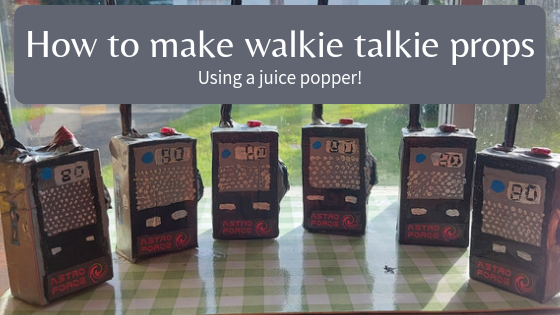
When you become a school parent, it’s a whole new ball game of DIY crafts, building, last-minute costumes for things you swear you didn’t know about until the day before and the list goes on. When my daughter started prep 4 years ago, I couldn’t have pictured the number of things I’d be trying to make for school musicals etc down the track. Yet, here we are 4 years later, writing a blog post to help other parents learn how to make walkie-talkie props. You know, just in case you ever need to know how to make them last minute. Maybe you’ve clicked on this to enjoy a fun craft with the kids though, who knows! Either way, you’ll have fun making these as we did!
How to make walkie talkie props
What you’ll need:
- Empty juice poppers (straw included)
- Duct tape (the more the better, you can never have enough duct tape!)
- Paint (black, white, red and then any other colours you’d like to add to your walkie-talkies)
- Paint brushes- thin and thick
- Empty paracetamol sheet
- Soft drink lid
What to do:
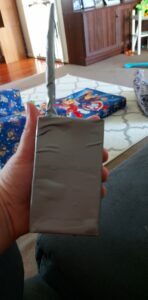
- Rinse out and air dry your juice poppers and their straws.
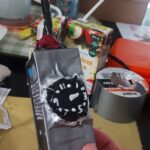
- Cover the straw in layers of duct tape to create the thick, straight and sturdy aerial part of your walkie-talkie.

- Cover your juice box entirely in duct tape. Make sure to have the least amount of bubbles and creases as possible and remember where the straw hole is.
- Stick a pen through the duct tape over the straw hole to create a hole for your aerial.
- Poke the aerial through the hole and secure it around the base with duct tape so it doesn’t wriggle around.
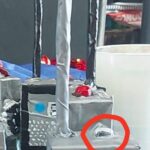
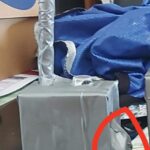
- Cut off a clear popping part from the empty paracetamol sheet and use duct tape to secure the edges to the top of your walkie-talkie on the opposite side to your aerial.
- Secure the soft drink lid to the right-hand side of your walkie-talkie by completely covering it in duct tape strips, connecting to the walkie-talkie base. (Try to keep the top of the lid nice and smooth so you can paint numbers on later).
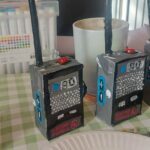
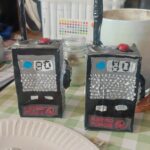
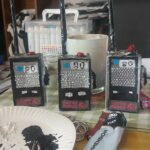
Now that you have your base completely put together, it’s time to draw and paint!
Painting your walkie talkie
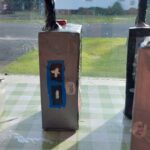
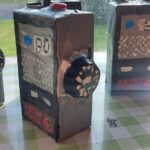
- Using a ruler, draw the border onto the face of your walkie-talkie.
- Paint the aerial, side button and inside your border on the face of the walkie-talkie black.
- Paint the paracetamol popping part on top red.
- Using silver or white paint, paint in the speaker holes and two front buttons. Plus the screen for your channel numbers.
- Black paint can be used to create 2 rectangles on the left side of the walkie-talkie and then outline them in blue or a colour of your choice.
- Once dry, use white to paint the + and – on those side buttons.
- Use black and white paint on the right side button (soft drink lid) to create a dial.
- As soon as the white paint for your “screen” is dry, you can paint on a digital channel number (we chose channel 80).
- Add in any extra touches you may want.
- We added a clear sparkle paint over all the remaining duct tape as well as the aerial too.

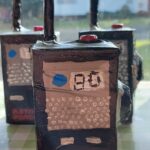
Have fun making your walkie-talkies and watch the amazement when you explain it’s made from an empty juice popper!!
