
I’d never realised how overwhelming it could be to actually sit down and try to organise your photos, until I decided to organise mine. Five years of having my own children and years of friends and family photos. Not to mention the millions of teenage selfies that were taken, and all those screenshots that seem to pile up in the blink of an eye.
Remembering back to when I was a little girl and my family were discussing a “safe point” for us to go to if there were ever a house fire. I would send myself crazy trying to organise in my head who would take each animal to safety and who would be left to save all the priceless photo albums. I didn’t care about anything else expect all those pictures we would lose forever if there happened to be a fire. Nowadays it’s so much easier to back up all our photos and videos to countless devices so people don’t lose all those precious memories in an emergency.
If you’re the kind of person who likes things organised and easy to find, then read on and you will find out how I made organising my photos a little less overwhelming and how it became a “me time” activity that I looked forward to every week.
Steps to organising your photos
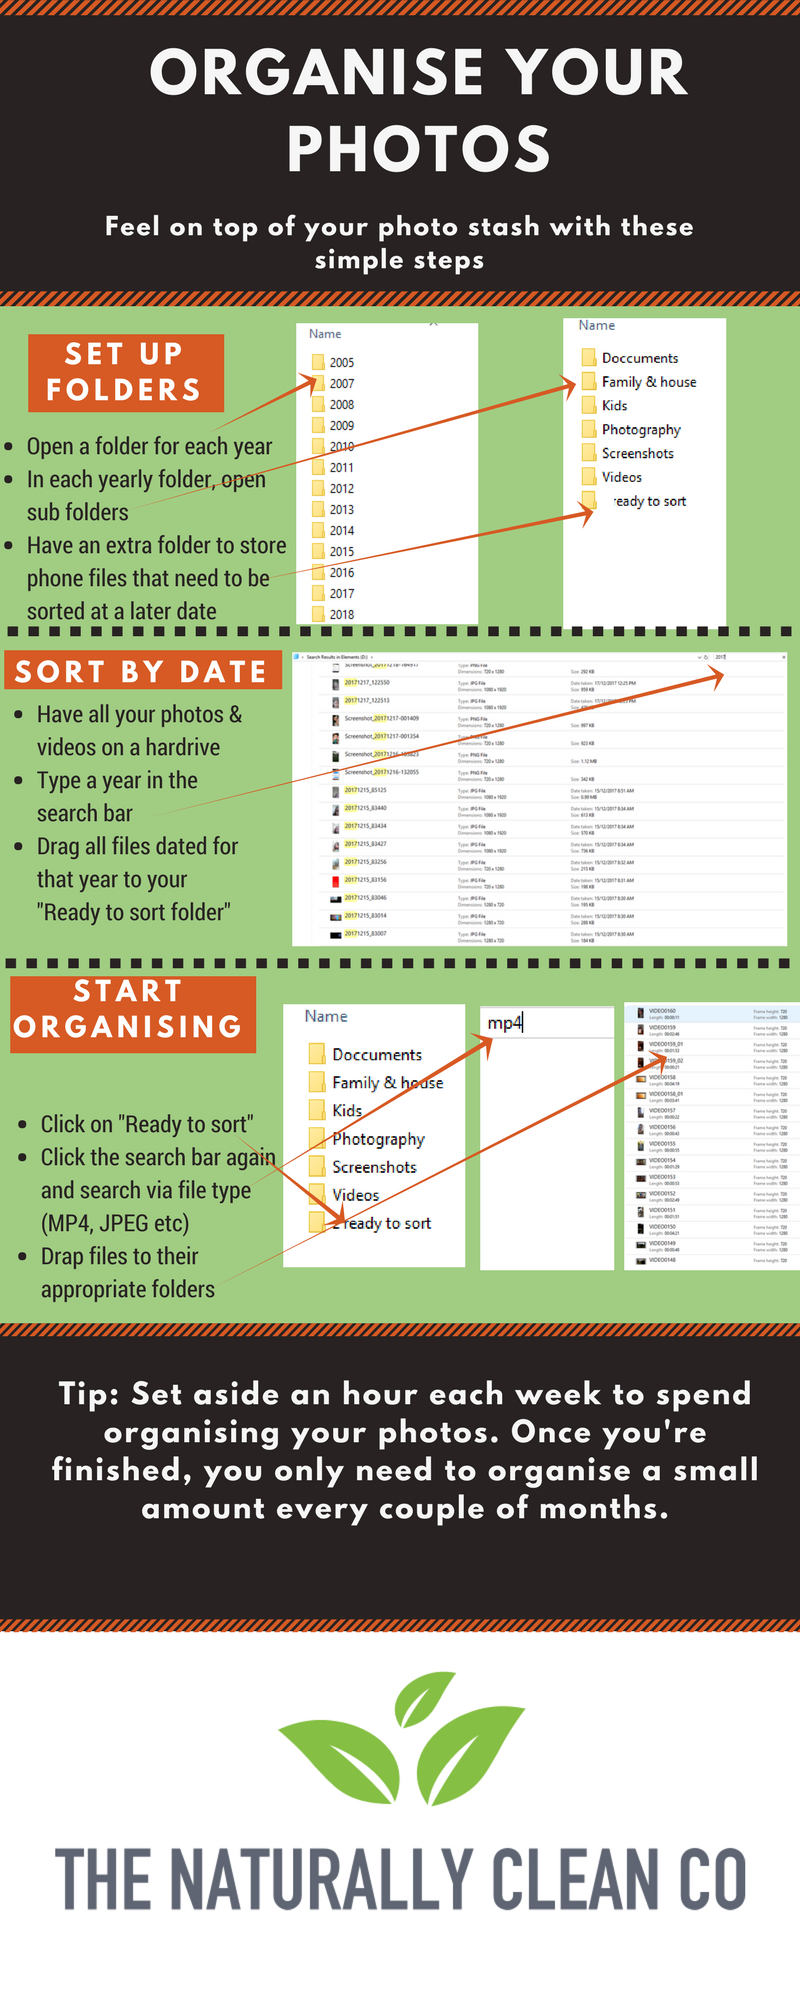
- Purchase a portable hardrive
- Create your first folder named “Photos to sort”
- Move every file from your computer and phone and any other device to the “photos to sort” folder
- Create a folder for each year dating back as far as your earliest digital photo was taken
- Create sub folders in each year such as; family, kids, screenshots, videos, Bobs wedding, etc
- Create an extra sub folder for each year named “ready to sort”
- Open the first folder “photos to sort”
- Click the search bar in the top right hand corner and type the year you want to find first (ie. 2017) and all the files that are dated and/or named 2017 will pop up
- Now click Ctrl+A to select all the 2017 files and move them over to the “ready to sort” sub folder in the 2017 year
- Now You can click into your 2017 folder and then through to “ready to sort”
- Using the search bar again type in your file types such as MP4, JPEG, PNG etc and start moving these into the appropriate sub folders for each file.
Tips
- I set aside 1 hour each day or each week that I could sit down and dedicate to organising my photos
- Choose a different year each week and work to have that year finished by the end of the week
- Once you’ve sorted all of the years to the current year then you only need to organise every time your clear your phone or camera
Organising your photos isn’t for everyone and that’s totally fine, but for those of you who are like me then you will find this project to be a relaxing and rewarding one.
If you have any helpful tips that you find makes the process even more tolerable then let us know in the comments because here at The Naturally Clean Co we love anything that’ll simplify and organise our lives even more!
In an upcoming blog we’ll show you an even easier, less time consuming way to sort all of your photos using the help of artificial intelligence.
Check out other blogs from The Naturally Clean Co here.
